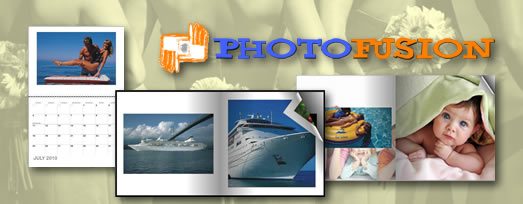
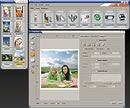
 Dodge Hello again! This week’s newsletter does not cover all the technological details of a new professional printer or other piece of equipment. Today, I would like to talk about an online service that will help you create fantastic photo products easily and at a very competitive price: PhotoFusionStore.com. As you already know, digital photography is more than pointing and clicking and this is true for both the casual amateur and the professional photographer. With PhotoFusion you now have the opportunity of creating amazing Memory Books, Journals, Photo Prints, Calendars and more. It is my favorite tool for printing weddings and other events. Kathy and George got married last spring and they hired me as a photographer for their wedding. They decided to have the pictures bound on a leather book and also wanted to have some Memory Books to give to their parents and friends plus a bunch of photo prints in a variety of sizes: 4x6, 8x10 and even 20x30. I knew right from the beginning that PhotoFusionStore was going to be the right solution for my project once again. To begin with, registering to the website is as simple as choosing your user name and password, that’s it- within two minutes you’ll be navigating and viewing the different options available. Let me describe the normal workflow of creating a Memory Book. The first thing you would probably do when starting a project is to upload the images. You can upload as many as you need and even group them into different folders that can be named in a useful way (Usually I upload all the pictures and print a Proof Book for the customer to review). Then you select the Product you want to create from a pull-down menu, in this example it will be Memory Books, the very first option at the top. In the next steps you choose the cover type, color and size. There is variety of sizes available ranging from small 3.5x3.5in. up to 12x12in Square, Portrait and Landscape. My favorite for weddings is 12x8 as it renders a very well balanced format and the photos look terrific. You can choose from several templates or create your own design. The background image for instance, may be one of the images uploaded by you or you can select one from stock. I like to use a rich pattern image and then change its opacity to around 20%. Monochrome or sepia backgrounds are very interesting too and make the main images stand out. You can select the font style, size and color too. The next step assembles the book automatically and renders a preview that can be browsed and even lets you edit any page. Yes, you can resize, crop and rotate the photos as required before sending the project to print. The price of the project is always visible at the lower right corner so there will be no surprises at checkout time. Needless to say, Kathy and George were delighted about the books and they ordered a couple of Day Planners to show the images of their honeymoon in Europe. Now it’s your turn: go to PhotoFusionStore.com, register and create several projects, there won’t be any charges until you place an order so have some fun! For best results I use the browser Firefox, from Mozilla. Thank you for reading and I hope you enjoy using PhotoFusion as much as I do.
|
June 24, 2010
PhotoFusion Store
June 15, 2010
Caldera's SnapRIP+
Caldera SnapRIP+ Lahcen Hello! This is Lahcen bringing you news about a fantastic printing software for photo professionals who look for a productive raster printing solution for their Epson, Canon and HP wide format printers. I’m talking about SnapRIP+ by Caldera. It packs the same power and features as Caldera’s RIP solutions for printing wide format jobs with eye catching colors and contrast. Many of you may be wondering what RIP software does to improve your printing jobs. RIP stands for Raster Image Processor, which is the way of converting your images into a format that the printer understands. The RIP software executes many operations in the process: it converts the RGB images into CMYK, it applies color profiles, scales the image to the desired size and resolution, etc. As a matter of fact, the RIP software replaces your printer’s driver by taking full control of the print engine for a more accurate, high quality output. SnapRIP is very simple to use so you don’t have to spend time with trial and error (wasting valuable paper and ink!) before you can produce really astonishing results. SnapRIP includes tools that let you create your image from different files and view it in High Quality Preview before printing. The Compose tool enables you to assemble and layout multiple images from your Image Bar to make a unique document. As you gather all the images to the work area you can move, resize, rotate, align, manage depths and add text as needed. And you don’t have to worry about positioning the files on the final image because SnapRIP packs one of Caldera’s key features: Nest-O-Matic. It automatically positions the files across your roll or sheet for media and ink optimization. This helps you save media because the program takes care of the fine details for you. Sometimes I have to print several copies of an image that is smaller than the media loaded on the printer, so what I do is repeat the image many times across the media. Before installing SnapRIP in my computer I was tired of having to RIP the file many times and then positioning it properly on the layout, watching the gap between the images and so on. SnapRIP includes a sophisticated automatic feature to do that job efficiently called Step & Repeat, with it you RIP the file just once and the program does the rest saving a lot of time. But there is something else about ripping files with SnapRIP and it is that you can RIP a second file while you RIP and print another job at the same time. That’s right: while other RIP programs have to follow the RIP-then-print sequence, SnapRIP lets you RIP your second file WHILE still printing the first one thus increasing the productivity of your printer dramatically. Remember the High Quality Preview Display I’ve mentioned earlier? Well, I have to tell you it’s much more sophisticated than a preview, it shows you how the files are going to look on your media while enabling you to zoom in and out, rotate, reverse, expand to full page, set 100% size, resize, move and recenter. And the best part is that there is no need for RIPing the file at every change. Believe me, there are so many features included in SnapRIP that make this product unique. It includes one Wide Format Printer driver and is upgradable to the next productive printing solution VisualRIP+, with a Postscript/PDF engine for producing posters, kakemonos, advertisements, POS, etc. Contact me for more information about SnapRIP or visit us for a demo, I’m sure you’ll love it. Thank you for reading!
| ||||||
June 08, 2010
Mitsubishi Express Lab MT1U
 |
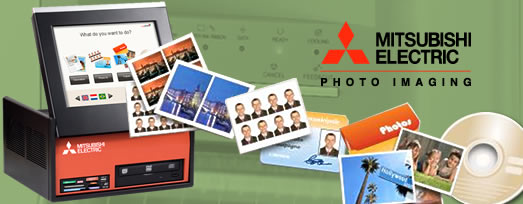
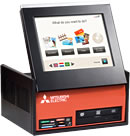
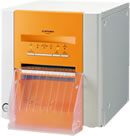
Mitsubishi Express Lab Frederic Hello friends, it’s Frederic again bringing news about the Mitsubishi Express Lab MT1U, a fantastic solution that can help your business enter the highly profitable Photo Lab market. This system offers a wide variety of options and you’ll be surprised to know how easy it is to install and operate. The touch screen shows all the options in a very friendly graphic interface and here’s where you realize how versatile the MT1U is. You can choose from Compositions, Photo IDs, Calendars, Collages, Frames and Greetings, Mosaic Posters and more. You can even change the language of the whole display with one touch! This is of great value when your customers are visitors from other countries. The MT1U offers several tools for image enhancement too, just to mention a few: One-touch image adjustment to correct brightness and contrast, Red-Eye removal, Crop, Zoom, Rotation, Sepia and B/W. The Photo ID engine is very powerful and allows you to compose an ID photo from an existing image. Thanks to the different layouts available for each country and Biometric Masks to position the picture correctly, you’ll be able to create professional Photo IDs in minutes. The MT1U accepts most of the digital media formats in use today: Compact flash type I, II and DMA, MicroDrive, SD (incl. miniSD, microSD and HC types), MMC (incl. RS-MMC), MemoryStick (incl. PRO, Pro Duo and MS Micro), xD card (type m and h), CD/DVD and USB flash drive. The CD/DVD drive is actually a burner so writing backup disks from memory cards is another interesting option available. The printer on this lab is a CP9550DW-U based on Dye Sublimation Thermal Transfer with a resolution of 346dpi and includes two modes – Fine and Super Fine. It can print a 4x6" in as little as 15 seconds! Due to the fact that it employs media rolls, paper jams are things of the past. It can print different sizes depending on the media installed 4x6"s on the CK954R rolls, 5x7" on CK955R, 6x8" and 6x9" on CK956R. The system includes tools to help you control its operation. Price Management allows you to have 3 different price ranges. There’s also an optional Ticket Printer that lets you charge exactly what was printed, Statistics and more. Contact me for more details or come to our show room for a demo of this fantastic new product from Mitsubishi. Thank you very much for reading! |

